How To Achieve A Glowy Makeup Look

The beauty industry has been my passion and job for years. I was adopted from India and have now worked on advocating for inclusion in the beauty Industry as a Digital Creator. I enjoy nothing more than beating my face, soaking my skin in a delicious face mask and telling my Instagram followers all about it.
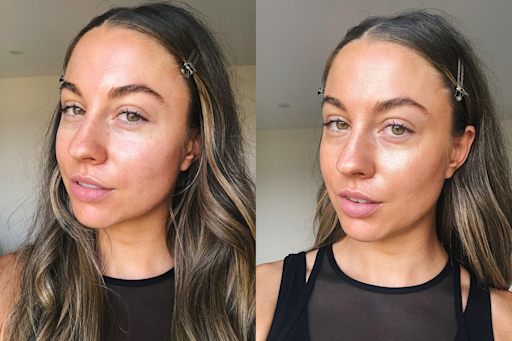
The beauty of the soft, natural, glowy look is that it is easy to achieve and extremely versatile. Not only is this look incredibly comfortable, but it is perfect for someone who needs to take their look from day to night.
In this routine, Ruchi Page shows us how to make our look glisten, glow and stay all day with her best makeup tips and tricks.
Ruchi Recommends:
- If you’re using a shade that is too dark for you presently you can mix in a lighter concealer to even it out, or just highlight more of your face.
- Remember to take your foundation down your neck!
- Bring your concealer up onto your eyelids for it to act as an eye primer.
- Allow your concealer to set for 30 seconds before blending it in, for longevity.
- Apply powder lightly for a dewy outcome.
- If you get mascara on your eyeshadow - relax, let it dry and lightly remove it with a Q-tip.
How to get Ruchi’s natural, glowy makeup look:
Step 1: The vitamin enriched face base

Step 1: The vitamin enriched face base
First, prime your skin with a small amount of the . This primer contains Vitamin C and E, so it gives the skin a beautiful glowy texture. Warm the product up in your hands, so it can blend into the skin seamlessly, and then massage it into your face. This will provide a nice, even texture perfect for makeup application.

Step 2: A luxurious & luminous foundation

Step 2: A luxurious & luminous foundation
Ruchi goes in with one pump of the , using a blending brush to buff and bounce the product into the skin. This foundation is suitable for all skin types, and looks soft and luminous.
Step 3: Bomb concealer

Step 3: Bomb concealer
Highlight and conceal with the . Ruchi raves about this concealer and uses it under her eyes, dragging it downwards in order to make her face appear more narrow. She also highlights her forehead, down the nose and her upper lip. To make her concealer look extra glowy, she then adds some to her already damp and blends it in. Remember to bounce, don't swipe!

Step 4: Set it

Step 4: Set it
Ruchi sets her base with the cult classic . This powder is great for all skin types and tones. It can be applied with a damp beauty sponge to set in the areas you have applied concealer, or dust it all over with a brush for a very light effect. If you are baking, remember to dust away the excess afterwards with a clean fluffy brush.
Step 5: Blend. Out. Everything.

Step 5: Blend. Out. Everything.
Using the flat side of your damp make sure you blend out any harsh lines. Bounce everywhere. This will help your makeup look super seamless.
Step 6: Bit of spritz

Step 6: Bit of spritz
Next, Ruchi gives her face a bit of a spritz with the to bind everything together nicely. Allow at least 60 seconds for it to set.
Step 7: Toasted crease

Step 7: Toasted crease
To warm up and define her crease, Ruchi applies the with a small fluffy blending brush. After tapping off the excess, she concentrates the colour on the outer corner of the eye, blending it into the natural crease of her eyelid using circular motions. Fluff it out towards your outer corner to elongate your eye shape.

Step 8: Contour your nose

Step 8: Contour your nose
Using the same bronzer and brush contour your nose by taking the colour directly down both sides of your bridge from your inner corner. Using the same colour will make your look feel cohesive and natural. Then, blend it in with your beauty sponge to diffuse the lines a little bit.
Step 9: Easy cut crease

Step 9: Easy cut crease
Take a lighter shade of the on a small liner brush and create a subtle cut crease by applying the product from your inner corner, drawing a half moon shape across the lower part of your lid. Go in with a lighter shade like the in Brule, simply patting it on with a flat brush.

Step 10: Redefine

Step 10: Redefine
Then, using your and a fluffy brush, lightly reapply the colour to your outer corner and crease and blend it all out using soft, circular motions. Apply the bronzer to your lower lash line for a super defined effect.
Step 11: Teased out mascara

Step 11: Teased out mascara
Using the allows you to lift and tease your lashes. Start at the root of your lash and zig-zag upwards.

Step 12: Bronzed up

Step 12: Bronzed up
Take a big fluffy brush and bronze up your face with the . Just create a number 3 on each side of your face and remember to blend in the powder. Then you can blend everything out asgin with your .
Step 13: Metallic skin finish

Step 13: Metallic skin finish
With a fan brush apply the on the highpoints of your face. Again, blend out everything with your for a seamless result.
Step 14: Taupe nude lip

Step 14: Taupe nude lip
Ruchi uses the in Taupe. She suggests this as a great neutral/nude colour for deeper skin tones and applies it straight from the bullet. She then applies a slightly lighter shade in the centre of her lips to create an ombre effect.
Step 15: Final spritz

Step 15: Final spritz
Give your face a final spritz with the to set everything in and give the skin a subtle, dewy finish.
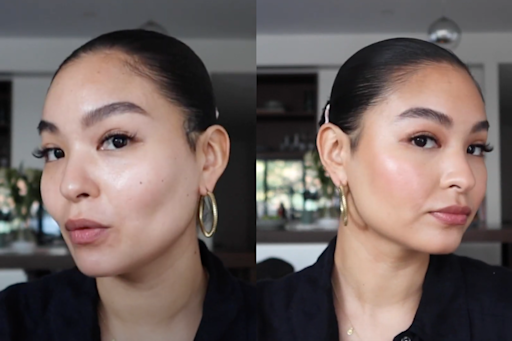
The Final Look: Fresh, Dewy Makeup With A Hint Of Glam

The Final Look: Fresh, Dewy Makeup With A Hint Of Glam
We hope you enjoyed Ruchi Page’s glowy makeup tutorial and have fun recreating this beautifully blended and luminous makeup look at home.
How do I get glowy makeup to stay?
A great way to get your glowy makeup to stay all day is by starting with the right primer for your skin type. Of course, most skin types will benefit from a hydrating primer, but if you’re extra oily, or oily in certain areas, try mixing it up with something more mattifying.
Another great way to fix your makeup in place is with a setting powder. You can opt for a light translucent powder or one with a natural, luminous finish if you’re worried about losing that glow. If you have dry skin, try just setting under your eyes and across your T-zone.
Finally, perfect your base with a setting spray. Not only will a setting spray help to lock your makeup in, it also helps the makeup merge with the skin and revives a bit of that glow post-powder.
This routine was transcribed by India Williams
A Makeup Artist's Advice On How To Get Glowy, Dewy Skin
Before you start your glowy makeup look, why not try this skincare routine for radiant skin?

Our Go-to Dewy Makeup Look Using Giorgio Armani Luminous Silk
Try a subtle and sophisticated glow up with this L’Oreal Australia makeup routine from Ross Andrewartha